Negatives 101
Written by A.J Taylor
PART 1: What are they? Why are they important?
Firstly, in the world of film photography you likely will come across the term ‘positive’ and ‘negative’ film. This refers to the way the image appears on the film (and also indicates a difference chemical process for development). For example, with slide film the images can be seen in realistic colour on the very negative – hence, a positive image.

A negative is therefore the opposite; it is an inverted image in which the brightest parts appear dark, and the darkest parts appear light/faint.

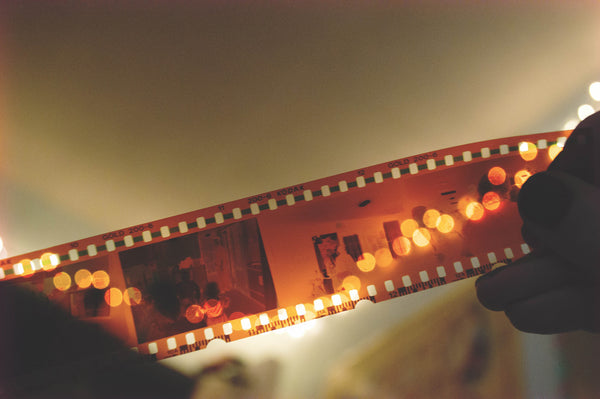
Any roll of film (colour or black & white), whether directly from a canister or within a disposable camera will have negatives that you have exposed your images onto, and these can tell you a whole lot about your photography once they have been developed.
Perhaps the most important lesson: EXPOSURE
"Exposure is the amount of light which reaches your... film. It is a crucial part of how bright or dark your pictures appear." Spencer Cox for PhotographyLife.com
UNDEREXPOSURE:
If you have underexposed your roll, you will struggle to see much detail on your negatives, appearing almost transparent (also referred to as ‘thin’). This means that very little information has been captured on the film and this will result in a lack of vibrancy and brightness in your images - if anything can be seen at all. In low light without the use of flash, there might not be enough light to capture any information at all, resulting in a scanner not being able to detect anything as there is essentially a blank gap of unexposed film.
This is very easy to do as film is not as sensitive to light as digital – which is what most of us are accustomed to. So, we can mistake a low light scenario as having enough light because our phone can handle it and it doesn’t seem that dark to our eyes. Using flash indoors and in any low light scenario is the best way to avoid underexposing your negatives – particularly if you are using a disposable.
If you have a camera with a light meter, do not attempt to take a shot if the meter is letting you know that there is not enough light. It can be awfully tempting, especially if we really want to take that particular shot, but it’s just not going to have enough light to be worthwhile. If you intend to shoot in low light conditions, opt for a faster film like 800 in which the grain itself is bigger and therefore able to gather more light.

OVEREXPOSURE:
If your negatives appear very dark, you have overexposed them. This can occur for a number of reasons but some of the common ones include: firing a flash too close to a subject (check the minimum distance for your camera’s flash) or you have gone significantly over what your light meter indicates for the scene. For example, if you have a 400-speed film in the bright sun and would like to shoot wide open (with a f/2.8 aperture) but forget to adjust your shutter speed – you might end up overexposing.
We also see it occur very often at the beach where the bright sand bounces the light back - so be mindful of how your environment can impact your exposure (i.e. Where is the sun? Where can light bounce off?)
Slightly overexposing can be done with the intention to increase contrast or saturation, however when a negative has been super overexposed, you will see an increase in grain, a reduction in contrast, and duller highlights. In order to try and recover any other information that might be in your negative, the lab will usually try to compensate by adding density to reduce the intensity of the highlights.

LIGHT LEAKS:
Your negatives can be very telling when it comes to discerning whether the back of the camera had been opened at any point, fogging the film by accident OR if there is a way in which the light is leaking through the actual camera in which a repair is required.
We can see if the back of the camera has been opened at any point whilst shooting as there will be sections of light fogging and surrounding frames might also have discolouration bleeding into them as a result.

Light leaks commonly caused by a deterioration in the black out lining or elsewhere in the camera body can be determined by seeing whether the light leak extends through the edge signing (perforation) and is not confined to the frames.
FOGGING:
Fogged negatives are those that have been completely exposed to light. They will appear completely dark, usually black. This could be the result of rewinding the film with the back of the camera open, or forgetting to wind the film back at all before removing the canister, leaving the film exposed. Sometimes it can be a case of someone accidentally opening the back of the camera like a friend or sibling, not aware that film is light sensitive.

BLANK:
Completely blank negatives mean that the film was never exposed to light, so it was likely unused or the film never moved from the loading/starting position.

OLD/EXPIRED FILM:
Old film can often lead to a deterioration of overall colour and added graininess. This negatives also tend to be curlier and much darker.

EMULSION:
If you are an avid film shooter or end up being really happy with the results you received from a particular film stock, you might want to know exactly what it was in order to replicate it.
Your film negatives will indicate the brand, the speed/film stock type, and the frame numbers on the edge signing (excluding specialty films as they are originally consumer films that are then carefully pre-exposed to achieve special effects). This is also particularly helpful when you want to have a specific frame reproduced as an enlargement or reprint as we work with the number of the negatives.

Summary: Light is the most important aspect of film photography or photography in general since the word photography literally originates from ‘painting/drawing with light.’ It is how we capture an image on film. By exposing our film to light for a certain amount of time and knowing the right amount needed is how we create a good exposure. This is why you need to be paying attention to your negatives. Being able to see what happened and understand WHY is essential to getting the most out the analogue experience!

Part 2: Why Should you Keep your Negatives? How do you Store them?
Hopefully Part 1 of our Negatives 101 Series provided some insight on the value of your negatives for your photographic knowledge and awareness. Beyond that, there is the simple fact that it comes down to safeguarding your memories!
When you book in a film to receive scans only – we will ask whether you will be returning for your negatives (which we will always recommend).
Why Keep Them?
Your negatives are what you have exposed your images onto, ergo they are your original. If you ever lost the downloaded scanned files due to a hard drive or computer breakdown and we no longer have the scans on file, then the only way to retrieve the images lost would be to rescan the negatives! If you have discarded them, then you have discarded the hopes of recovering them for good. This is why it is good practice to hold onto them - just in case!
You might even want a particular image you took on your roll enlarged, so it would be best to go directly from the negative. This is true in any case when working with images; if you want the best quality results, you start with the original.
Even if you think the pictures you take right now aren’t that important, you may regret not keeping the negatives in the future when it turns out that that fun photo of your family would be perfect for a 50th celebration, or that photo of your pet as a puppy will be a comfort when they pass. The point is – these are memories that you can preserve for yourself by future proofing them right now.
How to store your negatives?
When your order is completed by the lab, it will be filed in a photo wallet like pictured.

Once you open the wallet, you will find your negatives cut up inside the inner pocket and a 4x6" index print will be filed behind. This allows you to see exactly what was on that roll and can serve as a useful reminder if it was taken some time ago.

If you rarely shoot film, you may choose to keep your negatives just like this and store somewhere safely. However, if you want a more organised system to archive your negatives, we keep Albox archival solutions readily available in-store for this purpose.

Albox Archival Solutions
Albox are an Australian owned and operated company, “specialising in the design of leading-edge products for records management - office, archival and photographic.” (Albox, 2021).
They carry a certified range of acid-free sleeving or ‘pockets’ not only for negatives, but for slides, documents and photographs.
All these pockets pass the Photographic Activity Test (PAT) of the National Archives of Australia. This is designed to, “test the quality of photographic storage materials.” (NAA, 2021).
Read more about the PAT via About the Photographic Activity Test | naa.gov.au
As such, Albox is acid, metal and adhesive free, meaning there are no chemicals or materials that can affect the quality of what you choose to store within their archival albums.

Storing 35mm Negatives
All 35mm film fulfilled by our lab is cut up into strips of 4. Thus if you were looking at a system like this for yourself, you would need the 4-strip pockets.


Carefully avoid touching the actual negative, and handle by the perforation (edges). For the best treatment, consider using cotton gloves.

You always know what way the pockets are supposed to face based on the text imprinted at the bottom.
If you shoot medium format (120) film, you will notice that we already provide the negatives back to you in Albox pockets - so all you have to do is acquire an album!
All these pockets are designed to be stored in their range of photo albums or ‘binders’ which meet the same archival standard.


These albums can not only accommodate your negatives, but also anything else you would like to add (sample of prints/slides/documents etc).
How We Started Archiving Our Negatives
Firstly, we will share a little tip with you that you might find helpful. When you pick up your film order, the receipt from the lab will have a sticker with a number on it and if you check the top of your negatives, there will be a matching number. This is called a twin check and it is how we match orders to the film as it is processed.
I choose to take advantage of it as well for my own record-keeping. I peel off the sticker on my order/receipt and press it onto the index print so I can easily discern what roll is which once they are removed from the wallets.

I then want to be able to have my index prints filed alongside my negatives, so I also use the 4x6 Photo Pockets in between.

Albums
The photo albums come in two sizes 25mm and 40mm. Pictured is the 40mm in Black, which can hold up to 50 pockets, whilst the 25mm can hold up to 30. If you shoot film regularly, we recommend the 40mm to maximise your filing space.

Summary: Archiving your negatives earlier rather than later can save you so much time, sweat and tears! It is a great way to track your photographic progress over the years and record what was important to you at that time. Taking responsibility for your negatives means that you can look back at the school/uni/work photos you shot with film 50 years from now!